Welcome!

Thanks for stopping by!
We are two house-loving DIYers now onto our second house. One of us has vision...and one has actual skills.
Design and working on our home are our major hobbies, whenever we have a few moments of free time not devoted to our daughter or jobs. We are hoping to share our ideas, triumphs and mistakes to help other DIYers and get new ideas from all of you!

Sunday, October 9, 2016

Chipping away...


More bedroom touches, countertop in the butler's pantry, insulation, scraping wallpaper, work on my office

Hello, again!  With school in full-swing, the last few weeks have not been focused on the house, but we have still been chipping away!

I made two more changes in the bedroom:
1. Spray painted the Ikea bedside tables gold (I used Rustoleum)
2. Switched out the arts and crafts knobs on the dresser Brent refinished for oval brass ones

For me, spray paint was definitely easier than Rub n' Buff, but I will admit I like the finish on the overhead fixture better, but not enough to apply the rub n' buff by hand to the two lamps...


Changing the knobs was one move in my quest to balance out the masculine side of our bedroom. Don't get me wrong, I enjoy the strong geometric patterns and dark wood, but the room still needs a bit of softening. Plus, the brass elsewhere highlights the nailheads on the bed.

With two changed...

Ta-da!

The marble countertop has been installed in the butler's pantry, making it a functional surface.  I love that little room more and more...the storage is HUGE, the window and original sink are a happy reminder of our home's age. The marble is classic, won't get a ton of wear and tear in there, and lightens up the dark cabinetry. We still have work to do in there - patching the walls and repairing the inside of the cabinets, installing a backsplash (I'm leaning towards antique mirror tiles to further brighten it up) and possibly a small throw rug, oh... and restore the window and under-cabinet lighting.


We have not had a ceiling in several places since....June. This includes the mudroom and powder room, which had heavy damage from leaks and ice dams, and the 2nd floor bathroom ceiling.  A speed bump in putting the ceilings back in the mudroom/powder room has been insulating first. This was becoming more apparent over the past few weeks as the temperature dropped, and there was literally a breeze back there.  But, this weekend, Brent checked that one off the list! After some research and talking with other friends who have DIY-ed spray foam, Brent chose Foam it Green. First he put up rigid insulation on the outer walls, then sprayed, then added some batting insulation. It's nice and cozy now!


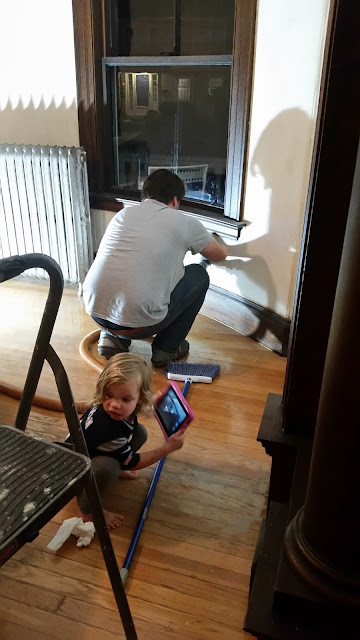
We are also on our way towards paint in the Living Room! After several false starts at scraping, Brent dove in and got it done over several evenings this week.  Friday night we washed the walls, and today Brent started patching and sanding.


Tessa helping clean up.

Tessa "taking pictures of Daddy working."
This last picture brings up a recent event...Tessa woke up in the middle of the night, sick with a fever and insisting, beside herself, that we had to get dressed and go to Home Depot right now...to buy paint...for her room...brown paint! She literally had a tantrum about this very specific errand, for 25 minutes. Now I know most of that was the fever but, between that and her documenting Daddy's work...I think a bit of our DIY-ness is rubbing off. Also, she now says, "because they are old and we have to be nice to them," when asked why we cannot slam the doors in this house.

Hoping for some paint in the living room next weekend!

Here's one of my inspiration pics - still crushing on a velvet green couch, and I'm considering Edgecomb Gray for the paint color.

http://www.cocokelley.com/2013/09/go-for-the-green-sofa/ 

Knowing that the Dining Room will be quite vibrant with the wallpaper that will one day be there, I want the Living Room to be a bit more subdued.

I've also done a bit of work on my office...that'll be its own post...soon?

Saturday, September 10, 2016

Right light, wrong color.


When I found the light I wanted for our bedroom, I loved everything about it - the oversized scale, the geometric vibe, the airiness, but NOT the color options - it was either antique bronze or silver in stock and I knew I wanted something in the gold family.
In the process of picking out...about 22 light fixtures, I thought - I can fix that later!  But then it was up...and the thought of taking it down to spray paint it seemed like a speed bump that could turn into months.


The antiqued bronze was too much dark with the wood of the headboard/footboard of our new bed, the dark wood trim that is in the entire house, and the dark navy of the curtains - as T would say, Same, Same! Too much matchy-matchy for my taste.  The room needs some lightening up and some bling.  Thankfully, Benjamin Moore's Glass Slipper paint is pulling its airy weight on the walls, but we need some metallic accents.  

Enter Rub n' Buff.  The name...is too much, but I think it's basically oil-based paint mixed with wax. It comes in tiny tubes.  I got the Gold Leaf tone from Amazon - so cheap it was an Add-on item. I followed the directions, cleaning the light and letting it dry before I started applying.  I figured - about an hour? Silly Liz...so many surfaces/angles to cover!


I used an old piece of cotton clothing I didn't want anymore to apply the stuff.  It said finger or cloth...I thought I'd try to keep clean. Again, silly Liz. It seemed darker than expected as I started to apply it, but I figured I was going for it now.  Unsurprisingly, the 2.75 year-old interrupted the process about an hour in and I had to go back later to finish, but I don't think that down time affected much. I probably would just cut my nails really short and use a finger next time (I think it will be under my nails for weeks despite the cloth and using nail polish remover to clean my hands afterwards).  As I got used to working with  the material, I think bare fingers would have made for an easier application. I was able to finish the application in about...2.5? hours.  Perhaps removing the fixture and spraying it would have been faster....but I do like the finish.
Here is how it looked applied, but still drying and not buffed yet.


It is already feeling much lighter!

I will update the post tomorrow after I buff :)

In case you're curious:
Curtains (Overstock.com)
Rug (Overstock.com)
Bed (Jordan's furniture, but I believe it was discontinued...hence the deal :)

Update:

I'm unsure how much a difference my attempt at buffing made, but I think it's a little shinier?


The lack of any flat surfaces made buffing feel futile, but I do think it helped. Seeing the gold in the room also inspired me to dig into the coat closet where ALL of our hanging pictures and mirrors are living for now and find Nonny's mirror.

It had hung in her dining room, and then ours in the last house, but it felt perfect for between the two front windows. I'm getting used to using the picture rail trim - no holes in the walls is nice, but the tipping forward is slightly annoying.


I think I might do spray paint for the bedside lights...to save time and dirty fingers.  I would ideally like to have sconces some day, but for now I'm more than happy to spray our very budget-friendly Ikea lamps.


The master is inching closer and closer to completion!

Remaining on the punch list:
1. Find art to hang to left of the side window.
2. Swap out the pulls on Brent's dresser for oblong round antique brass ones.

3. Find new bedside tables - Brent made our current beauties, and I have plans for them in our to-be-furnished Living Room.  Plus, they are  too low with the new bed.  Since we have different amounts of space on each side, I doubt the new ones will match.  They are on my running list of things to hunt for in Home Goods etc.

4. Long term - replace brown Ikea love seat I've had since my Southie apartment with a chaise.

Sunday, August 28, 2016

The time we threw a BBQ in a dirt pit

Well, despite our better judgement, we just could not allow our 6-year streak to be broken, and so threw our 7th annual Summer BBQ.  It was later than usual, there were no signs/decorations, and everything felt quite a bit thrown together.  Also, it was held in our "yard," which is currently a dirt pit.  Literally. There are 4 tufts of grass. A big thank you to all BBQ-goes who graciously brought potted plants that we hastily threw into planters in advantageous spots.

That did not, however, prevent the inevitable cast of sub-six-year-olds to emerge looking like Pig Pen, our lovely daughter included.

Highlights of the event:
1. The GIANT ball of all-colors-together of Play Doh that was created (my one and only activity I provided this year...)
2. Said ball of Play Doh adorning one dad's head.
3. The self-guided house tours.  I'm glad everyone knew I was serious when I said - go for it!
4. The electrician, painter and real-estate agent (and their families) staying multiple hours and seemingly enjoying themselves (as opposed to a business-boosting appearance made).  They are all fantastic and I will refer anyone who is in need to them.
5. Finding out that people are actually reading this!
6. Discovering that the hot tub cover makes a great serving surface.
7. Convincing the painter (who doesn't really like to hang wallpaper anymore) to come and give Brent and I a tutorial for my dream Dining Room wallpaper.

8. Realizing that even without my usual level of attention to detail, everyone had a great time!
9. My dear friend who got me a cocktail and plate of food a few hours into the party.
10. Having some lovely friends and family get to see the "before" version of the house.

Today we actually spent about an hour on the third floor - first time that's really happened since we moved in.  It reenergized my plans for those spaces.  I think it will make an amazing guest suite when I get some furniture up there and spruce up the bathroom.

Thanks to everyone who came by!

I promise next year, there will be grass.  Brent is lining up the irrigation and landscapers as we speak. More on that soon!


Tuesday, August 23, 2016

Window Restoration Begins

The decision to restore, rather than replace, the windows on the front of the house (at least) was a no-brainer.  The 8 windows on the front facade are curved, and gorgeous.  Brent could work his way through the windows one at a time and I'm sure do as every bit a great job, but knowing that we need to button up this house energy-wise ASAP, we decided to hire professionals to tackle this in stages. The first stage began today and will include the 12 windows of the front two rooms on both the first and second floor (each has two front-facing and one side window).


 This is how the windows started out today:


 No windows!


Chains replaced the broken ropes attached to the weights.

Here is how they currently look. The glazing (currently white) will be painted black as well after it sets.

I think they look amazing.  And to be able to open them (the ones in the living room were not functional until today) is fantastic. There remain two big projects/costs associated with the windows: storm windows and screens.  We are leaning towards internal storm windows (and separate screens) for the 8 curved windows to maintain the aesthetics.  Any external storm will involve boxing the window, taking away from the smooth curve. We will probably go with traditional storms on the flat windows.  And we better get cracking...winter will be here before we know it and these gorgeous sources of natural light will be cursed portals for our precious heat to escape through. 

Why did you paint the outside of the windows black you might ask? What is your long-term plan for the exterior of the house?  Well, they key word here is LONG term plan. Unfortunately, that siding and the porch are far down on a long list of big ticket items including the kitchen and hvac. 

I have it in my head that the house wants to be a forget-me-not blue/purple/gray that I associate with one of my favorite movies (and books) of all time - Little Women. While I know the famed Orchard House predates our home and is brown, there is something about the color of Jo's dress in the last scene and Meg's (too casual) gown that make me want to dress this Lovely Lady up in a soft cloud of violet/gray/blue. 


In this case, the exterior will have a mix of: the to-be-found dream color, black shutters and white trim with a stained wood front door. Having spent way too much time today getting a very messy rendering on benjaminmoore.com...here's the general idea:


That's not the perfect color, but I think it at least shows the dark shutters, what our door might look like in its natural glory after Brent strips the yucky blue paint off, and the contrast of white trim to black details.  Do you happen to know the perfect dusky, not-too purple, not-too blue, but definitely not gray color?  I refuse to even break out the fan decks knowing how far off this project is, but at least the windows in the front are on their way to looking their best!  We might do a phase-one redo next spring/summer where we strip the door, and paint the shutters and trim to obliterate all blue while we live with the white siding. While some conservationists will cringe, I also don't think all the windows will get restored..some will most likely get replaced for cost and efficiency reasons, but definitely not the front of the house, dining room, or landing.  I think after phase one and winter #1, we'll have a better sense of what the best solution is.  Personally, I'm ready to put replacement windows on the 3rd floor now - thank you MassSave and the fact that it needs every heating and cooling advantage we can give it.

The first 12 windows should be done by the weekend! I'll post some more pics when they are all done.

Friday, August 12, 2016

Lighting Preview and more House Name Ideas

While you will be sure to see the lighting as we tackle each room, I thought I'd share the round-up of the fixtures I chose to be installed during the rewiring. I knew I wanted a mix of fixtures that look like they may have been with the house all along (we kept the dining room chandelier) and some that brought a more modern update, but could all work together.

Considering how many had to be chosen at once, that we weren't even in the house yet, and there are rooms that have no furniture yet..I think it worked out pretty well - at the moment there is only one light I want to relocate because it's gorgeous and you cannot really see it in its current location. We also used inexpensive "filler lights" to hold spots for rooms that are really far down on the decorating priority list, or I had no ideas for.  T really likes her purple light - which is super fun, but also not that expensive to change out, should her love for purple wane. We went mostly with brass, antique bronze, and some chrome in the bathrooms to match the vintage style.
https://www.pinterest.com/bizzabeth/actual-lights-purchased/

You can check out the whole Pinterest board here with the selection of fixtures.

I've also started inspo boards for most rooms on Pinterest if you're curious about what you might find see as the rooms unfold.  All the ones for this house have a 2017 in the title.


Thanks for the House Name ideas that have come in so far!  I'm adding a few to the list here:

  • The Grand Dame
  • The Painted Lady
  • Shady Porch
  • Watch Park (one owner was a big wig at Waltham Watch Company)
  • The Berry House (original owner was A.E. Berry, who owned a dairy)
  • Dairy Queen (see above)
  • Rose Cottage
  • Bakersfield
  • Baker's Inn (can you tell we want visitors?)
  • Brentwood (there's a Brent and a whole lot of woodwork?)
  • Cedarwood (oh wait, Brent had those all chopped down...)
  • more ideas?

Here's a fun link to poke around on. Keep the ideas coming!

Thursday, August 11, 2016

Things that have happened so far and - what to name this house?

Even though I have had to work every day this week, Brent and I managed a lunch date Wednesday - with a pad of paper and pen to work on our master list of projects. So far, choose-your-own-adventure and working on anything has been great, because there is so much to do, but I feel that concentrating our efforts in a direction will, hopefully, start to make things feel a little more productive.

We started by making the list of all the work that has been done so far - owning the house for 6 weeks before moving in allowed us to rewire the place and tackle a couple of the other more messy jobs. Owning two houses was...CRAZY - especially when there were projects happening at each (buyer wanted some asbestos remediated at our old house as a term of the sale).

So...here's the list of what has happened so far at House #2
(Feel free to suggest names for the house in the comments section...it has been suggested the house needs a name. I am fine with it as long as it doesn't sound hoity-toity. Because that's just obnoxious. I do admit though, that House #2 lacks a certain charm.  My only idea so far is The Old Lady...but that feels unkind.):
  • Rewired entire house, adding a few outlets and overhead lights to most rooms, where none existed before (it took a crew of 6 guys 5.5 weeks, and was every bit as expensive as you might have guessed).  We also added hardwired smoke detectors, and ran some cable/internet to various rooms. The knob-and-tube was literally everywhere.
  • Had a painter patch the 270 holes made by above electrical work.  This was something we had envisioned Brent doing over time, but the dust/mess was too much to move into, so we hired it out.  
  • Brent single-handedly removed the basement ceiling - hundreds of pounds of lathe and plaster. 
  • He also removed the floor from the original laundry room in the basement. It was badly damaged and felt like...a trampoline.
  • Brent removed the ceilings in the mudroom and 2nd floor bath.  Both had water damage. Both had several layers of heavy lathe and paster. We have yet to replace them. 
  • We also ended up keeping the painter on for a few days to help get T's room and the master stripped of wallpaper, primed, and painted with one coat on (we did the second after the industrial cleaning).  
  • The painters/Brent were also able to get most of the ceilings on the first and second floor patched/primed/painted before we moved in - this was key.  Not only are we only dealing with walls now, but the calcimine primer reeks, and needed time to air out before we were living here...VOC's everywhere.
  • I stripped the wallpaper out of what is affectionately being called "The Closet Room."  I have taken over the bedroom behind the master as my giant closet.  The walls still need to be washed and patched before painting can happen.
  • Just for fun, the water main decided to go during the electrical work. At least we caught it and replacing it is now off the list.  While the backhoe was here, Brent took liberty with removing the rail ties and hedges in the front yard...and all the grass.  We now affectionately call our front yard the dust bowl. (Go BC!)
  • Brent removed the junky-looking built-ins in the Study.  Next to all of the original moldings and pocket doors they looked...sad. Someday Brent will put in some floor to ceiling library shelves himself. 
  • We had the gas fireplace insert with its moldy logs removed from the living room fireplace and the line properly capped off.  It was ugly and a source of anxiety. Now you can see the beautiful tile much better.  Any thoughts as to what we should put in there now?

  • Brent cleaned and installed a new gasket on the SUPER stinky washing machine.  I was ready to give up and get a new one...thank goodness for my stubborn hubby. It has been never properly cleaned/taken care of, and there was a leak due to a tear in the gasket.  So gross. 
  • We had the locks changed. That counts as a thing, right?
  • Brent repaired the bathroom window in the guest bath on the second floor so it is now operable.
  • We installed towel hooks in both 2nd floor bathrooms.  Where did these people put their towels when they were showering? Also, two new soft-close toilet seats on the second floor. 
  • Removed the nasty stair carpet pieces going down to the basement and replaced them with new ones.
  • Brent has started venting the bathroom fan on the 2nd floor so we can put the ceiling back up.  I have a feeling the ceiling will probably get farmed out to a professional. 
  • The tree-guys, who showed up unannounced at 6:30am last Friday morning, removed the cedar in front and several trees along the back fence. It initially made me sad, but I will admit that Brent was right and it looks a million times better. (See honey? It's in print now.)
  • Curtains are up in the Master, Guest Room and Tessa's room.  Will post pics later...
  • We bought our new bed and mattress yesterday! Super excited to be going to a king.  I love the balance of masculine and feminine in the bed.

So there we have it! I'm sure we forgot a couple of things...but that's a good start.  This list took 1.3 pages of the mini writing pad. The list of projects to be done took up...10 pages. Onward and upward! I'm noticing that Brent's name is up there about 200 times..and I...stripped one room of wallpaper. Thus is the reality of being the 2.5 year old's current favorite parent. Don't forget to post house name suggestions below. Thanks for reading!

8/23 edit - I cannot believe I left off that Brent and Trevor repaired and cleaned the hot tub (that I had assumed was dumpster-filler) in the backyard.  I will also admit that I enjoy it way more than I thought I would.

Monday, August 8, 2016

How do we DIY with a KID?


It's definitely been a completely different experience moving and starting to try to work on a house with a child. I've been reading some of my favorite blogs of parent DIY-ers..(Making It Lovely, Young House Love etc.) but still feel like we haven't quite figured it out.  Our 2.5 year old always wants to "help" and has strong opinions about what each of us should be doing at any given moment on the weekends.  Oh, she also doesn't like loud noises...as in the vacuum, ANY of daddy's tools etc. Do you see the cards stacking up against all of my glorious DIY plans?

Brent has taken some time off this week to dedicate some chunks of time to getting more settled and work on the house.  His priorities are all things that make me want to snore, though I know they are all super practical, important, and great ideas to do first:

1. Organize the basement/find and set up his tools - clearly this is important for every future project.

2. Go get the rest of our stuff out of storage - no need to throw more money away now that we have a giant basement and several currently-unused rooms on the third floor.

3. Something else boring that I can't remember.

4. Ready the butler's pantry for the marble countertop I insisted we buy before we even moved in (always planning ahead....). This involves building up the cabinet so that the counter will be higher than the original sink and removing a board on the wall.

5. Something about the TV's/cable thingies.

What did I want to work on this week? Only things with visible results, of course!

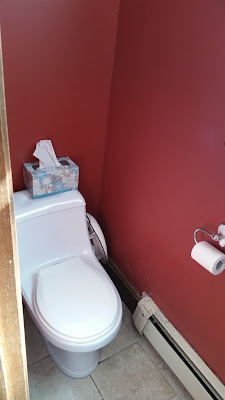
1. The Powder Room - Walls (bead board, paint, stencil perhaps?), find replacement sink and toilet. I will live with the floor for now.

How freeing to have more than one bathroom in this house...

2. Finish the first phase of the Master Bath - thorough cleaning, navy bath mats, patch, prime, paint, floating shelves/baskets for storage, possible medicine cabinet swap out. 

3. Keep scraping wallpaper in the living and dining rooms.

I was supposed to be off this week too...but that's not really the case any more, so we shall see what gets done.  I will say, the sound of him in the basement right now doing something with a power tool is making me feel nostalgic and excited about what's to come. I promise in the next post to cover what has already happened - it'll be a good reminder after making the giant to-do list.

Thursday, August 4, 2016

Going from Home back to a House

Well, we kind of got bored once our projects were done at House #1.  It seemed like the things we wanted to add or explore didn't quite fit with our first home's size, and we were tiring of our neighborhood's many motor cycle enthusiasts, so we had our eyes out for the past year for our next house to transform.  During the search, we tried to consider some more modern houses that were mostly "done," but...neither of us could get excited about any of them, and the lack of untapped potential left us feeling...blah.

Enter...House #2...a 1906 Colonial Revival that had sat on the market thanks to terrible marketing and being completely overpriced. After it's last price drop, I went first to check out an open house there solo, and then made an appointment to see it with Brent...my first thoughts - WOW the woodwork! Eeeeeew - almost every surface needs something. Do these people ever clean?  BUT it's not falling down and has crazy potential - not to mention a ton of space to utilize while redoing different spaces. TWO staircases! Actual closets for a house of this era! What a porch (I just hope I don't step through it in some spots)! Pocket doors! More than one bathroom! Could we maybe afford to make this work?? Over...many years?

And, it was in one of our two favorite neighborhoods  in town- this one with the plus of being closer to the center of town with all the restaurants, diners, and the library nearby.  If you're going to live in a little city - might as well be near the city part, especially with the benefit of being on a street that is rarely traveled, and thus feels more secluded than it actually is.

So...months of buying and selling drama behind us, a complete rewiring of the new house (thank you, knob-and-tube) plus moving, I type this in the Study of our next adventure...with a list of projects too long to enumerate.  I hope to capture some of our adventures here, as I did the first go around, though now with a two-year-old, this seems more daunting of a task :)  I look forward to the transformation from feeling like I'm staying at someone's bed and breakfast to the feeling that this is our family's home.

Welcome to our new house!